Easy to Add Bluetooth Input Antique Transformer Radio
The Tivoli Audio Model One AM/FM table radio has been described as "the best sounding table radio ever made," offering "the kind of room-filling sound that many other radios claim to deliver but often don't."
A heavy magnet, long throw driver is mated to a frequency contouring circuit that automatically adjust output over half-octave increments, resulting in musically accurate tonal balance and bass response. "When your stereophile loved ones turn the knob on this rock solid Henry Kloss Model One Table Radio, they'll cry with hi-fi joy"

The first series of Model One had a source selector at the front for only FM and AM radio. The radio however had an AUX input (mini jack) at the back. By connecting the AUX cable it would override the FM/AM signal to the amplifier. The only way to select radio as a source was by unplugging the mini jack from the back. Later versions added a AUX selection at the front. Now you could leave your AUX mini jack plugged in and select the source at the front.
Owning a first series Model One MK1, that still works excellent, I wanted to modify the radio adding a bluetooth module. This module would be the switching unit: bluetooth selected on a streaming device to stream music to the Tivoli radio. Switching off Bluetooth on the streaming device would give FM / AM. No more jack plugs to unplug.
The board that is needed can be sourced from various sellers. This actual board is Bluetooth 5 version. Cost for these boards is around $15. The board is actually nicely made and comes with all necessary wires.

First thing is to dis-assemble the radio. Remove the 6 screws at the back. Front and back panel is connected with wire ribbons. After removing the screws slowly pull the front out. The front needs to be pulled out & rotate anti-clockwise. At same time you need to rotate so the front faces up. When correctly done you now can slide the front panel through the housing while taking the back out.
The main PCBA layout of your Model One should look like this. Picture is showing the PCBA with modification.
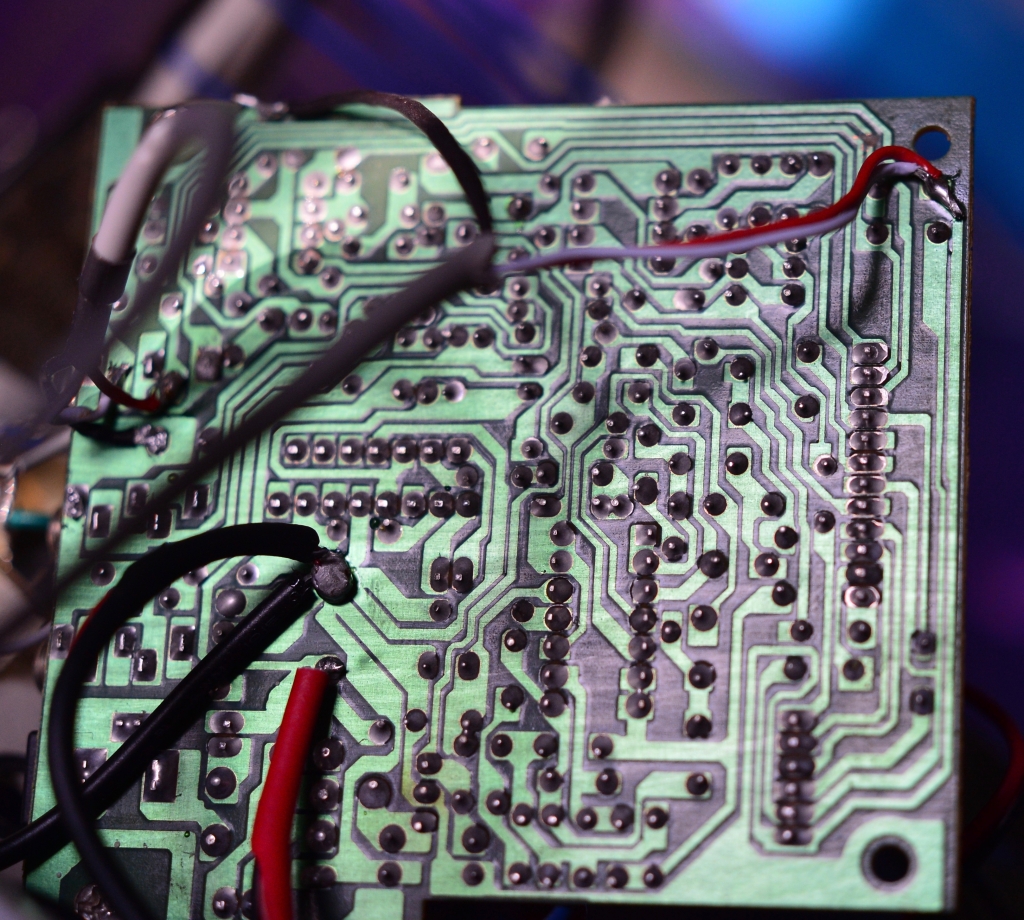
Next step is to locate the AUX connector on the PCBA board. This AUX connector is of a switching type as explained earlier.

The radio signal is flowing through to amplifier via pin 2 and 4 when no jack is plugged in to pin 3 and 5. If jack is plugged in two contacts 2 and 4 inside the AUX connector are disconnected, cutting the radio signal out. The mini jack signal has now priority, signal flows via pin 3 and 5 to the amplifier.
Connect line-out of the Bluetooth module to the AUX connector as per picture

The radio signal needs to be connected to the line-in of the bluetooth PCBA connector. It is necessary to cut the radio signal track on PCBA leading into the AUX. Not doing so will destroy you Bluetooth module. Below pictures shows the red wire and you see just above this wire the copper track is cut.


Once the Line-In and Line-Out wires are correctly attached, next step is to find the necessary power to feed the Bluetooth module. 12V DC can be picked from the main condensator on the DC side. Of course you can also decide to use a separate 12V DC power supply.

A small metal bracket to mount the Bluetooth module and the main PCBA together. The Radio can now be assembled again. Be careful mounting the rear module. The Bluetooth module just fits in the wooden housing. You do not need an additional bluetooth antenna.

Warning: As for all modifications: Assume you are familiar with PCBA, soldering and general safety aspects when working on electrical appliances. Disconnect always from mains before you start.
The AUX mini jack at the back can't be used anymore after this modification.
Source: https://magnimopus.com/2020/03/07/tivoli-model-one-mk1-adding-bluetooth/
0 Response to "Easy to Add Bluetooth Input Antique Transformer Radio"
Post a Comment